27. October 2020
Shredded Paper Spider
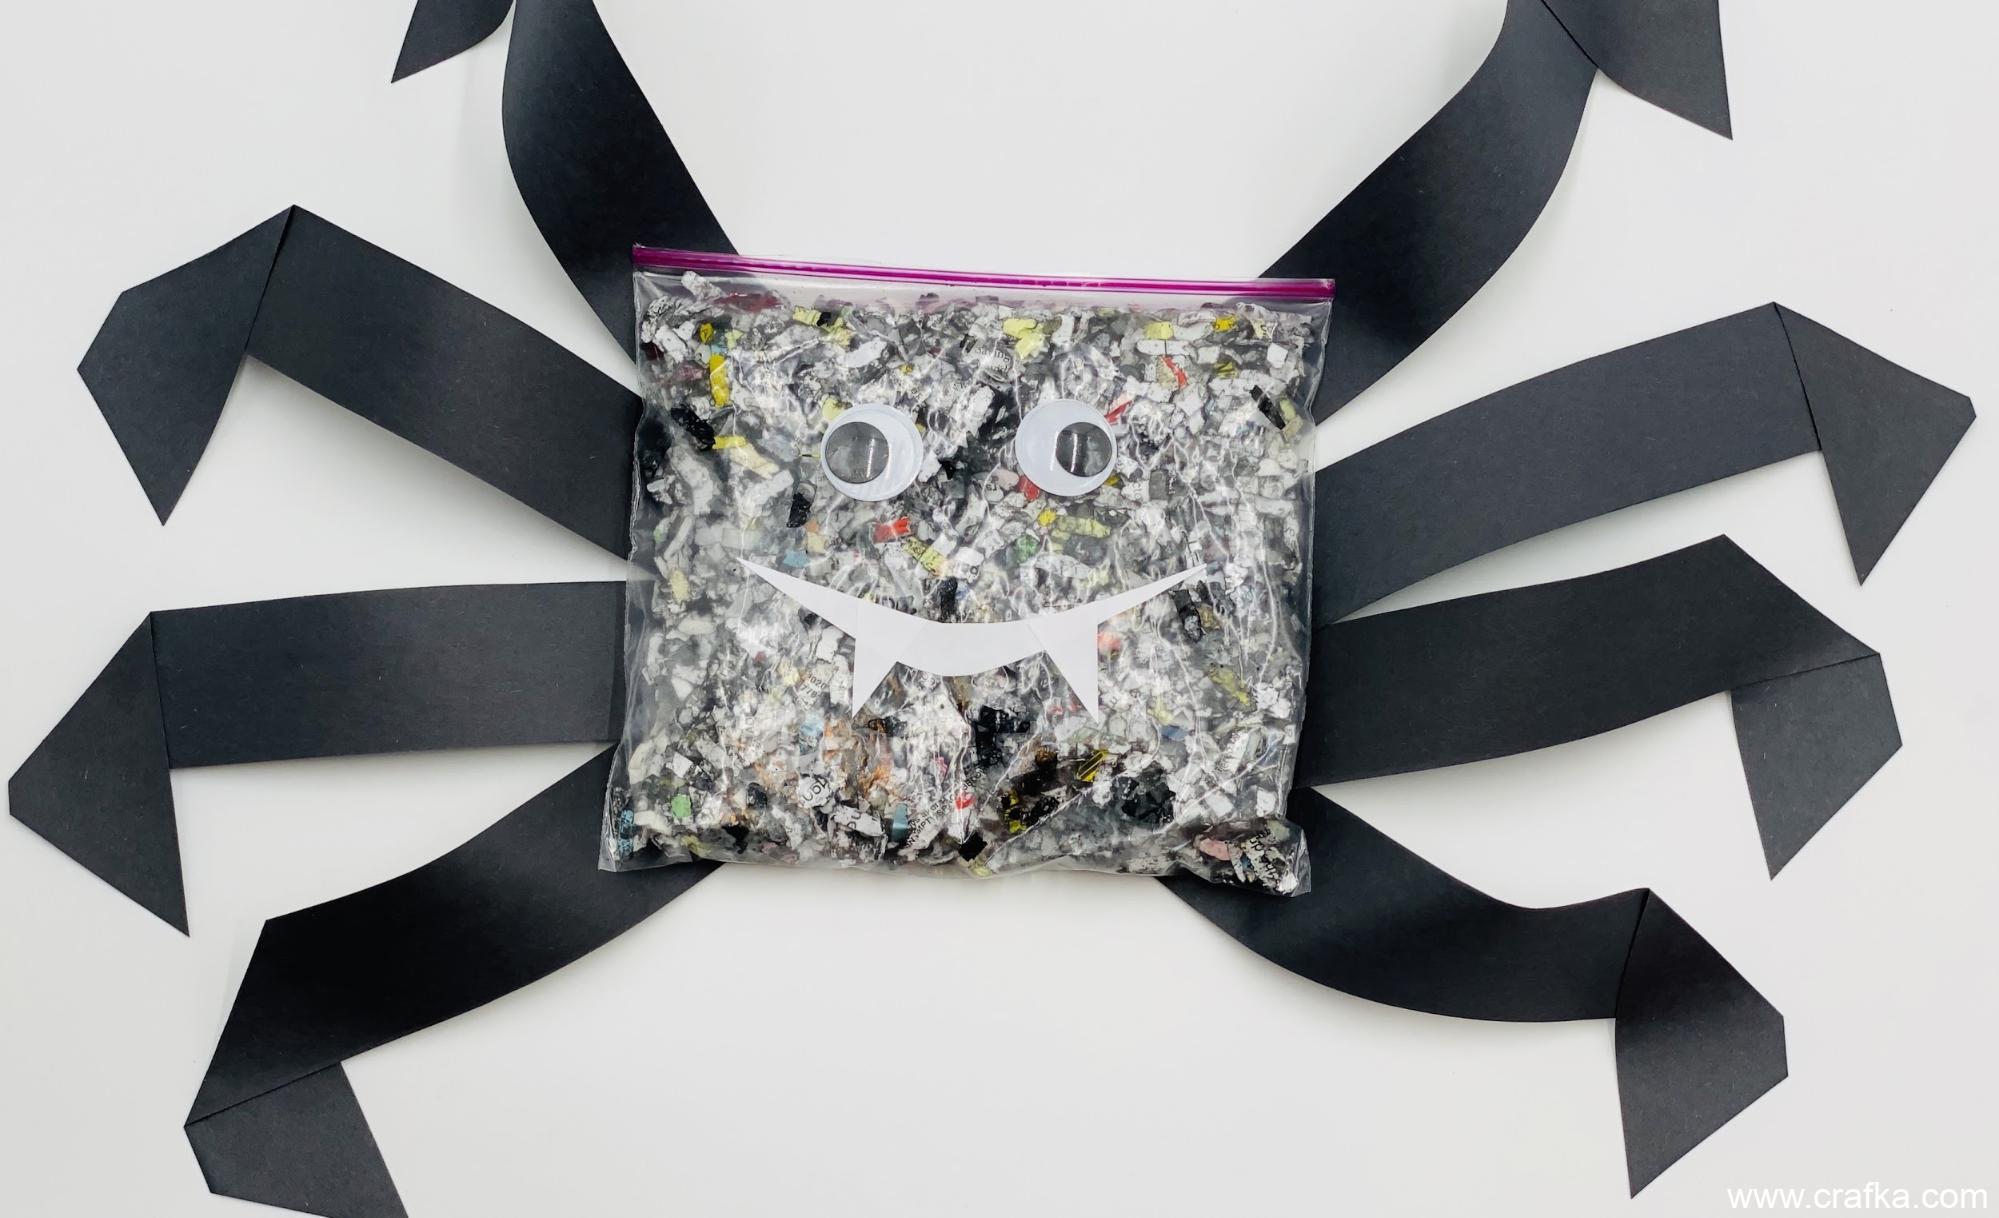
This Shredded Paper spider is a perfect art project for Halloween decor, and the best part is that it’s mess-free. All the mixing happens inside of a sealed zip-lock bag which makes it perfect even for toddlers and younger children.
You’ll need to start with gathering the supplies:
- a zip-lock bag
- shredded paper*
- tempera paint**
- googly eyes
- scissors
- tacky glue
- construction paper
- plain white paper
The items that I marked with asterisks can be substituted:
*Instead of shredded paper, you can use regular white paper that you’ll need to cut to small pieces.
**Instead of Tempera Paint, you can use Washable Paint, or even some Acrylic paint (make sure to dilute acrylic paint prior to using with some water).
***To make this activity super easy and completely paint-free, use already colored construction paper.
When you gather all you need, let’s start creating!
- Put some shredded paper in a zip-lock bag. I recommend adding enough paper to fill about 1/4 -1/3 of a bag because if you add too much paper, it will be more difficult to mix the paint.

- Squeeze some Washable Tempera Paint into the bag, seal the bag and mix the paint and shredded paper. If you need to, you can always add more paint to the bag. If you added too much paint, no worries - the paper absorbs washable paint well, and you can always add a bit more paper.

- Using your tacky glue, attach googly eyes to the bag. You can be creative with it: use different sizes of eyes, or put them in unusual spots. Have fun!

- Using your white paper, cut out the mouth for your spider and two triangles for fangs. Glue them to the bag using tacky glue.

- When the body of the spider is ready, we can make the legs. A classical spider has 8 legs, so cut 8 rectangular out of construction paper. Then bend each rectangle at about 1/4th of its length and apply some glue to keep it bent. As a final step, you’ll need to trim off the end of each leg, so it gets its pointed shape.

- Now, simply glue the legs to the spider’s body and trim off the colored part of the zip-lock bag.

Voila! Your Halloween decoration is ready!

*A useful hint: I’ve tried a stick glue and a tacky glue, but neither of them held the legs strong enough. The hold of tacky glue is good for the face, but to keep the legs in place, eventually, I had to use a simple old-school stapler. The final result I didn’t like because it got my spider misshapen. My guess is that the legs were too long and heavy, so the glue couldn’t hold it. Try to do smaller legs if you want your spider to look nice.