20. November 2020
Paper Plate Turkey
This super easy to make and super cute turkey is a great craft activity for your kids!
You will need:
- a paper plate (I used a small one)
- googly eyes
- construction paper to make a turkey’s head, a beak, and also for the snood and the wattle (those red folds of skin above and below the beak)
- school glue
- paint and brushes
- scissors
- a dark red sharpie (optional)
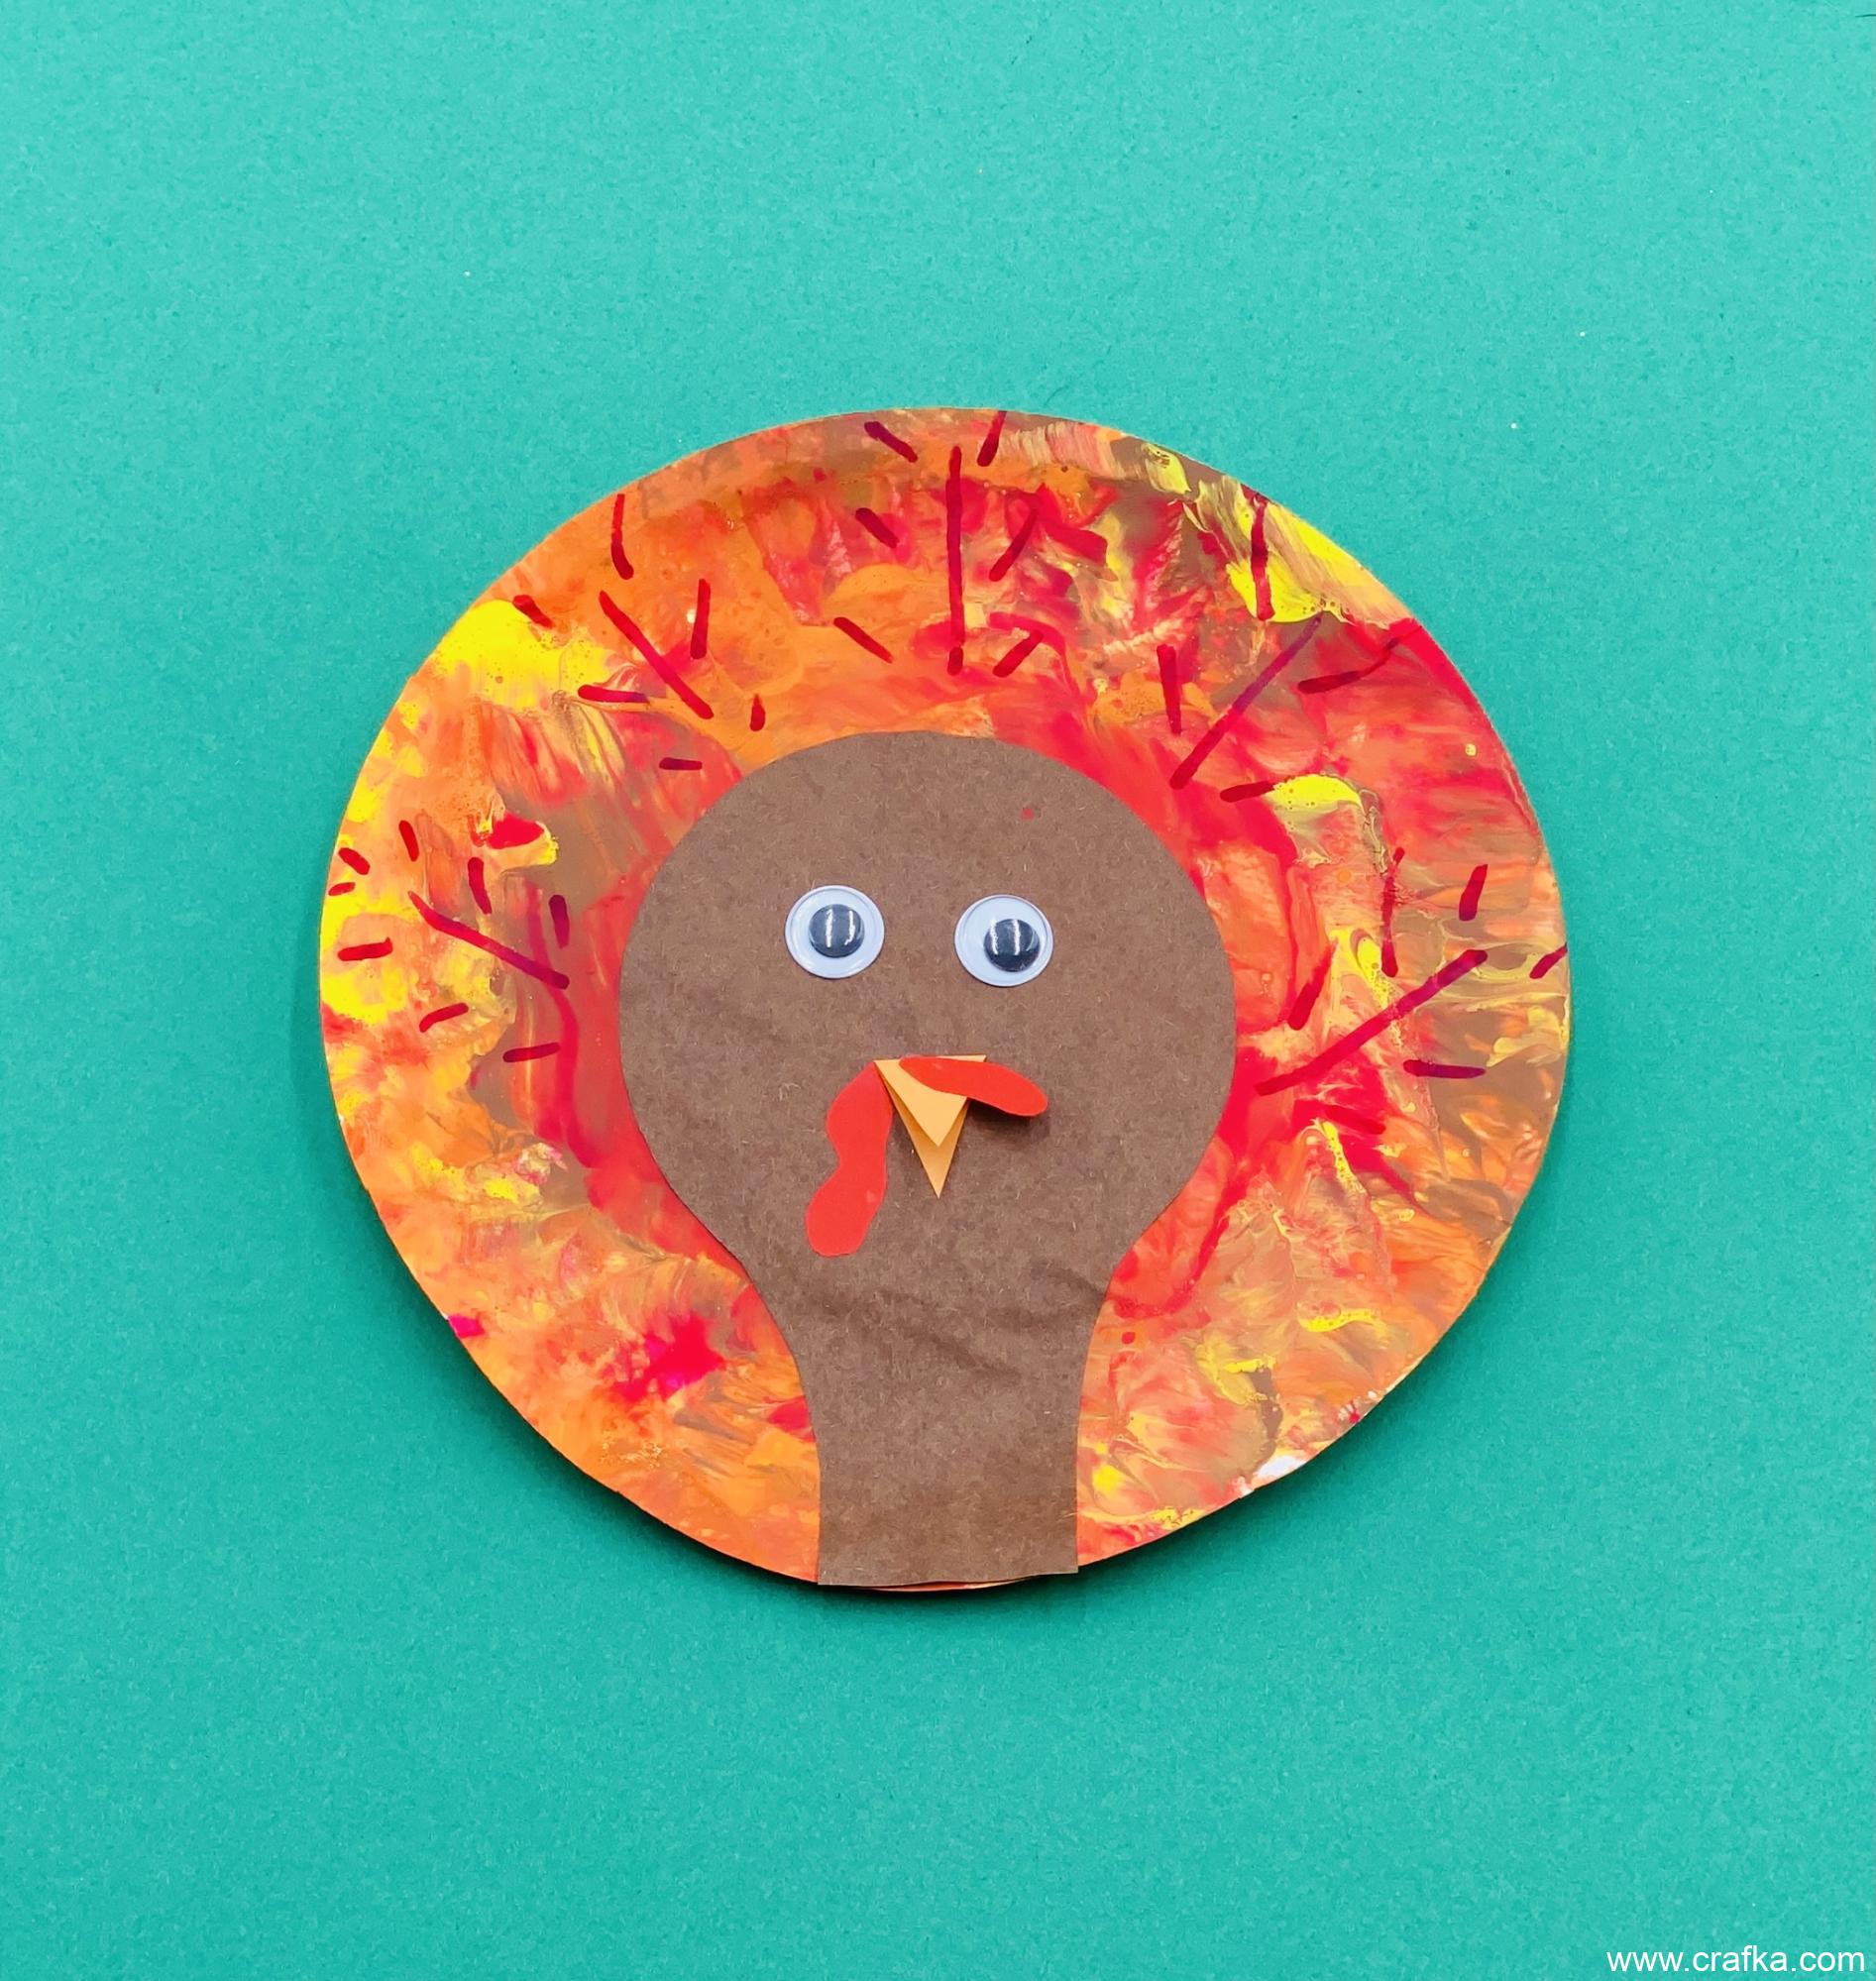
You’ll need to start with painting the paper plate. Use different colors and mix them on the plate to get the patchy pattern. I put a bigger plate underneath the one that I was painting, so the paint doesn’t stain the colored surface.

When the plate is dry, you can start making turkey’s head. Trace a cup to get the perfect circle for the turkey’s head, and then add two lines on the sides to make a neck.

When you get the outline for your turkey, use scissors to cut it out, and then glue it to the colored plate. Add googly eyes and make a beak out of folded in half diamond shape (cut it from a piece of red construction paper).

After that, cut out two misshaped pieces of red construction paper for the snood (a fold of skin growing from the forehead) and a waddle (a fold of skin growing on below the beak).

Your paper plate turkey is almost ready! Finally, use red sharpie to draw lines representing the feathers on the plate.

Voila! You just made another beautiful art project!